
This is the way… I 3D-printed a Mando helmet
I think we all knew it would come to this. If you didn’t know that Dani and I are Mandalorian fans based on our blog posts, it’s best you know now, because it’s going to keep coming up.
Almost immediately after I bought my 3D printer, I started measuring to see if I could print a full-scale Mandalorian helmet. And through the glory of the Force and an entire spool of PLA filament, it was so.
I should disclaim this blog by saying this is our specific journey, and not the only or even the best way to build a Mando helmet. In fact, there are definitely some things I would do differently, if I was willing to try again. But it’s a bit of an ordeal.
First off, this tutorial from Michaela over at Studio of M.M. saved my life. I followed her process almost beat-for-beat, just making adjustments where I didn’t have the same materials. She also has a newer video, that looks even better and shinier.
Printing the Pieces
It turns out that 3D printing a Mando helmet is not ridiculously hard with a 3D printer. It is, however, very time consuming. There are several different models for the Mando helmet that you can find on Yeggi, Thingiverse or MyMiniFactory, but the most popular that I’ve seen and widely esteemed is Rob Pauza’s version.
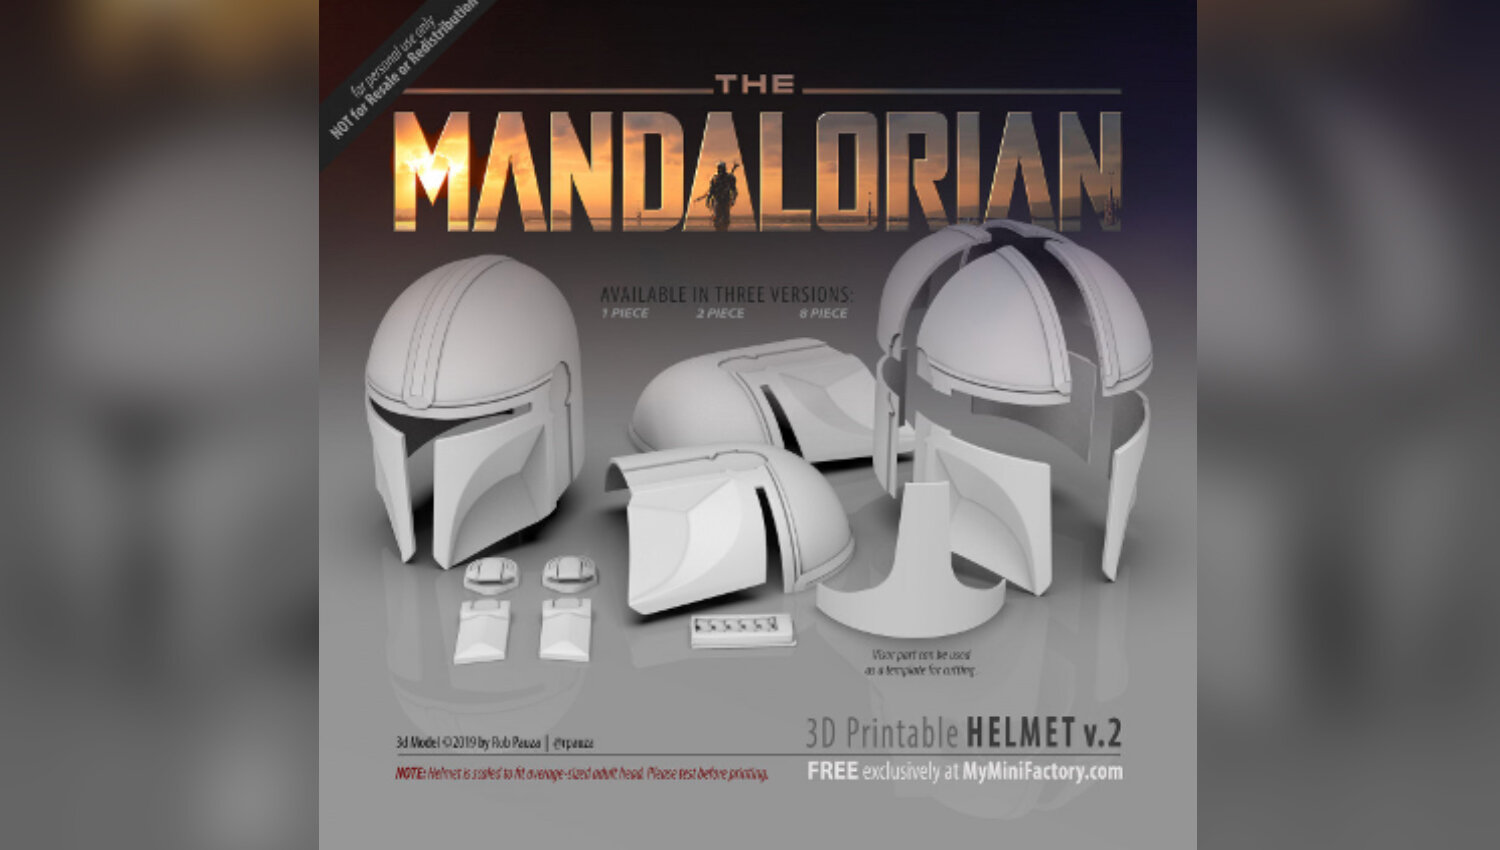
Some assembly required. Beskar sold separately.
Image and design property of Rob Pauza. All Rights Reserved.
The files give you the option to print the helmet itself in 1 piece, 2 pieces, or 8 pieces. Unfortunately, the compact Adventurer 3 Lite has a build space of 150 x 150 x 150mm, so we actually had to print it in 10 pieces. The bottom front quarters were too long to fit, so we sliced them in half. If you decide to print the helmet and can do it in fewer pieces, I recommend doing so. For one thing, the consistency of the pieces and overall strength of it will be greater. (You have to glue everything together, afterall.) We had a couple pieces warp away from the heated bed a bit while printing, so they didn’t line up as cleanly as I’d like. This may have been a setting issue, but it made gluing the parts together a bit nightmarish. I ended up having to melt or cut away part of the sides for a smoother fit, and I’ll forever notice a slight jag in the shape of the front that resulted from the misalignment.

A comparison of the support lines in the back of the helmet versus the front. All those ragged plastic bits will have to be woodfilled and sanded down.
A thing to note when printing these files: if you print the curved portions of the top of the helmet standing up, you will need a lot of supports. This will add a lot of time and filament. However, it means that the coarse areas where the supports connect are all on the inside of the helmet. Alternately, you could print it upside down and use a fraction of the supports, but then you have to sand/clean up all of the areas that had supports. We did the back 2 pieces upside down (light support on the outside) and the front 2 pieces right side up. If I did it again, I think I would do it all right side up and just recycle a lot more of the filament from the massive supports. Sanding the PLA turned out to be pretty labor-intensive.
The pieces took us about a week to print. My guess is that it was somewhere around 80 hours, but I really don’t remember. A couple individual pieces more than 10 hours total print time. We usually printed into the night and were lucky to have no major mishaps.

We printed a second kit of parts in a silver PLA for our friend Chris to assemble. This time we put all the print supports inside the helmet so the exterior was much smoother.
I Don’t Like Sand[ing]. It’s Coarse, and Rough, and Irritating.
The next step is actually to glue the whole thing together. We started with some Testor’s plastic cement to get a quick adhesion, then epoxied all the inside edges with J-B Weld. This was my first bout with J-B Weld. The stuff stanks, so make sure to work in a ventilated area. Our sources recommended wearing gloves, but this was early COVID, so decent gloves were in short supply. Instead, I chose to be very careful. We also made the mistake of getting clear J-B Weld. It’s a compound you mix together to create a cement-like bond, so having 2 different colors like in classic J-B Weld makes it easier to figure out if it’s a good balance. That’s harder when it’s clear (duh-doy). We used big ol’ popsicle sticks to spread the J-B all up in that noggin, and let it set. I worked in sections to make sure there was decent symmetry. If you have spring clamps, those could be handy to hold the pieces together while they dry.

We used a piece of fabric twisted into a nest to hold the Mando helmet while it dried upside down.
If you haven’t already deduced, the 3D printer is able to handle 95% of the Mando helmet job, but you do need a few accessories to bring the helmet to life. These include bicycle helmet pads for the inside and a very dark welder’s helmet film that’s fitted inside with fasteners called Chicago screws. It’s important to note that we started by gluing and epoxying just the front half of the helmet, then went in and stenciled, marked, and glued/epoxied all the Chicago screws needed to secure the welder’s film to make the visor. It’s way easier to get in and deal with the placement before the helmet is fully formed. Then you can just go back in and pop the visor film in and screw it down at the end. We had to buy 2 different types of welder’s visor film to find one we liked of the right thickness, and the Chicago screws were a little finicky to glue/epoxy down, but after minor mishaps, the visor was ready to place and we could go back to assembling the helmet.

I had never heard of Chicago screws before this project. Now, all the attempts at fastening them onto plastic have embedded them in my mind forever.
Once the whole thing is glued, I basically coated the entire thing in wood filler to fill in cracks and print lines, and then sanded the whole damn thing forever. And I mean forever. The video I recommended at the top suggested wood filler, but I’ll admit that I’m conflicted about it (Side note: My friend Alex, who makes high-quality replicas for monies and got a CR-10 just for this sort of thing warned me against wood filler because it wouldn’t hold up to wear and tear and would chip away over time. My helmet is primarily for display and I won’t be wearing it out much, so I ignored this advice. I stand by my choices, but also I what-if a lot). Wood filler is not the easiest to work with, and it seems like there are probably much better options to fill in cracks. We even used regular glue in places to fill in some cracks in less visible areas around the earpieces. I essentially smeared the wood filler all over the helmet in any place that I wanted to be smoother (adding water occasionally to make it spread easier), then once dried, went in and sanded sections as evenly as I could. It did solve my print line issues and filled in the spaces where the helmet warped, but the process took hours across several days, and sanding wood filler kicks off a lot of dust, so make sure to wear clothes you don’t care about and work in an appropriate workspace. I used compressed air to clear off excess dust at regular intervals.
“My Body is Chrome! My Blood is Gasoline!” -Random Post-Apoc Dudebro
Rick and Morty quote aside, painting the helmet was very exciting. We base-coated the helmet in white, then went in with our metal. We found a nice can of Rust-oleum Metallic All Surface Paint+Primer in Dark Steel at our local Home Depot that came out lighter than the color advertised on the can, but ultimately we were happy with the outcome. I confess, I was too nervous to do the spray-painting. I’m always worried I’ll do uneven coats. Dani did all the spray-painting. I’m a coward, but the coats are even and that’s all that matters. Then we went in with Rub n’ Buff Wax Metallic Finish in Silver and gave it some extra love. I think their Pewter might have been a better fit, but we just could not find it.

After taking this photo, I promptly handed the can to Dani and hid in the corner.
We did a little wear-and-tear detailing with some brown and rust acrylic paints to make it look like the sands of galactic planets had caked into the seams of the helmet. This served two purposes: it allowed us to hide any nicks in the helmet’s surface by making them look like mud and also added some screen-ready detail you’d see on actual film props.
After we had the right amount of grunge, we finished it with an Acrylic Sealer Finish.

Adding all the little details. This is the way.
Have Fun! And Remember, No Disintegrations.
Next step was to slide that welding visor back in. If you placed everything correctly and tested it before closing it up, then it should fit snugly. The Chicago screws keep it in place, and we even made little 3D printed washers under the screws to help ensure the visor wouldn’t shift. We strategically placed the adhesive-backed bicycle helmet pads around the inside for comfort and snugness, and then took it for a test-drive.

Practicing blaster fire scorch marks with the airbrush was fun, but also so stressful. You’re about to spray black paint onto the precious Beskar surface you’ve worked for weeks to make smooth and shiny.
We got pretty wrapped up in the thrill of making a full-scale Mando helmet. At some point after we’d wrapped, one of us mentioned that it would be fun to have an airbrush to make some blaster dings on the helmet’s surface. So then, naturally, we bought an airbrush because new toys are fun and pandemics are long. We experimented with some airbrush strokes and flares on paper, and then I characteristically handed the helmet to Dani to do the airbrushing. I really struggle with the bravery that it takes to potentially mar something I have given hours of my life to. If we had been airbrush owners at the outset, we likely would have experimented with airbrushing the surface in silver instead of spray painting. But that’s a time travel hypothetical that I’m not ready to think about yet. The reality in this present timeline is that we only used the airbrush for the blaster fire.
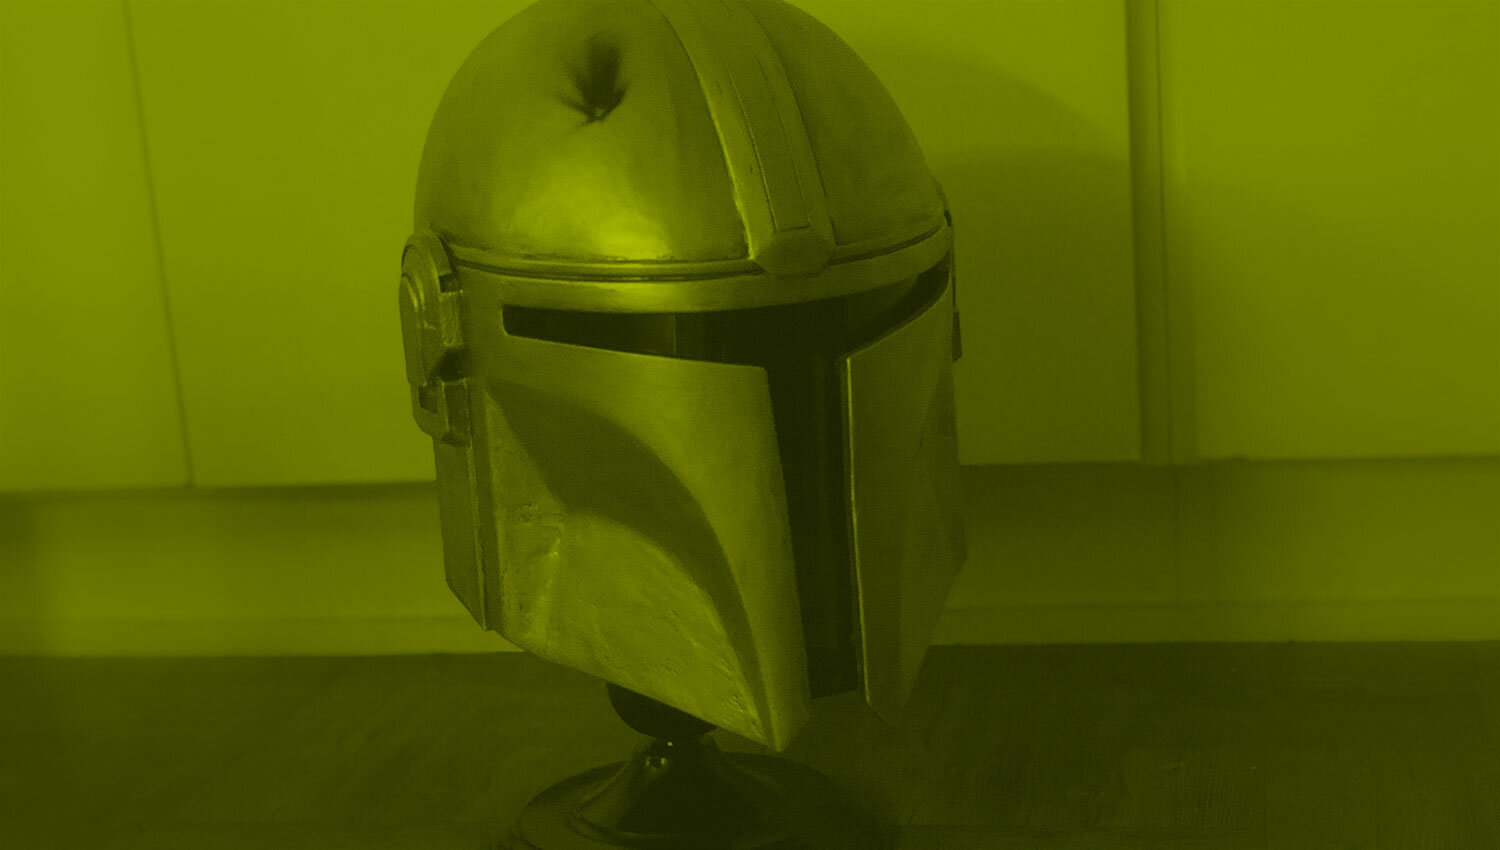
The end result? Let’s just put it this way: he’s a handsome boy.
Final Takeaways
I was a mess during a lot of this process. It’s a big project to undertake when you’re still learning to 3D print, and virtually every skillset in the process was brand new to me. Nothing sucks quite as much as wasting 14 hours and a bunch of filament on a failed print. If you are already pretty crafty and savvy with these sorts of things, you will undoubtedly knock this out in a few weeks. For me, this probably took 2 months. I would get discouraged or we’d have to order more things online, which would take a few days. Looking back at the pictures, it all looks simple and straightforward and it’s easy to forget what was so stressful. It certainly gets better with practice, but for me, the unexpected hang-ups and unknown territory was definitely intimidating.
If you’re new to this sort of thing, I wouldn’t make this your first project. Start with a simpler starter craft or learn some of the components first. If you have the 3D printer, print it in as few pieces as possible for strength and consistency. If you don’t have a 3D printer, you can probably find someone online to print it for you and send you the pieces. It always helps to have a wildly supportive and crafty girlfriend who isn’t too nervous to spray paint. But I don’t know how you get one of those – I ask myself how I lucked out on the daily. I can only tell you how we did it and what we learned. Oh, and below are a bunch more links that I got from my friend Alex, and other resources we came across while going through this process.
Good luck on your helmet creation, nerds. I have spoken.

Want to know more?
Seriously Nerdy always strives to provide recommended reading and outside viewpoints so you can chase your own fandoms and form your own opinions. If you’d like to learn more about this, we’d recommend:
“How to Make a Mandalorian Helmet” by Studio of M.M on YouTube
Mandalorian Helmet – v2 by Rob Pauza on MyMiniFactory
Another Great Blog Guide by Bob’s Workshop
Hobart Face Shield Replacement Shaded Lens on CyberWeld (#770580)
Recommended by a fellow maker: Alumaluster Chrome Finish by Imperial Surface Shop
Recommended by a fellow maker: Bondo All-Purpose Putty on Amazon